
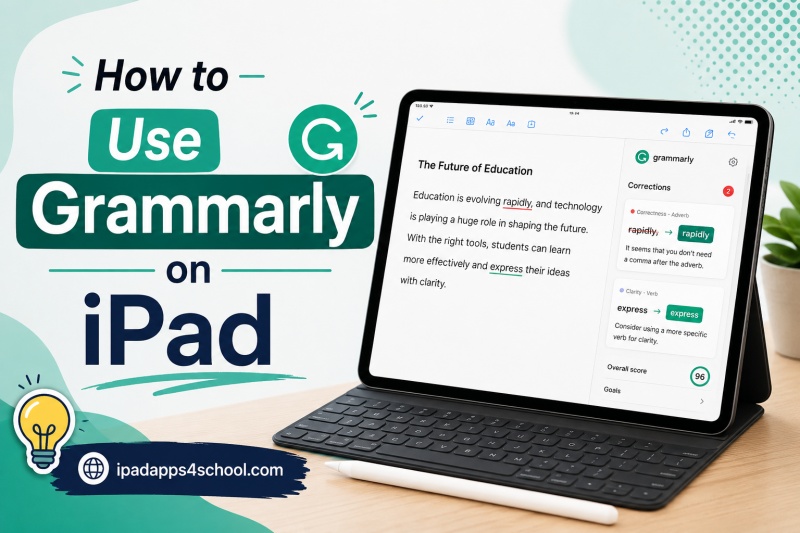
Writing on an iPad does not mean you have to sacrifice grammar quality. Whether you are composing emails, working on school assignments, or drafting documents for work, Grammarly for iPad provides the same powerful writing assistance you would get on a desktop computer. This comprehensive guide covers everything you need to know about using Grammarly on your iPad in 2026, from installation to advanced tips.
Table of Contents
What Is Grammarly for iPad?
Grammarly for iPad is a free writing assistant app that brings the power of AI-powered grammar checking, spell checking, and writing suggestions to your tablet. The app includes two main components: the Grammarly Keyboard, which works across any app on your iPad, and the Grammarly Editor, a dedicated space for creating and editing documents with advanced AI features.
The Grammarly Keyboard appears as a green G icon in your keyboard list and provides real-time suggestions as you type in any text field across iPadOS. The Grammarly Editor, accessible through the My Grammarly section of the app, offers a focused writing environment with additional features like tone detection and clarity improvements.
Unlike browser-based versions, the iPad app is designed specifically for touch interfaces and supports both on-screen typing and physical keyboards like the Apple Magic Keyboard. The app requires iOS 17 or newer and iPadOS 17 or later for full functionality.
How to Install Grammarly on Your iPad
Getting started with Grammarly on your iPad takes just a few minutes. Follow these steps to download and install the app:
- Open the App Store on your iPad.
- Tap the Search tab at the bottom of the screen.
- Type “Grammarly: AI Keyboard & Notes” in the search bar.
- Locate the official Grammarly app (developed by Grammarly, Inc.) in the search results.
- Tap the Download or Get button next to the app.
- Authenticate with Face ID, Touch ID, or your Apple ID password if prompted.
- Wait for the app to download and install on your iPad.
- Once installed, tap Open to launch Grammarly.
After installation, you will need to create a Grammarly account or log in if you already have one. You can sign up with an email address, Google account, or Apple ID. The free account provides access to basic grammar and spelling suggestions, while premium features like clarity improvements, engagement suggestions, and plagiarism detection require a paid subscription.
Setting Up the Grammarly Keyboard on iPad
The Grammarly Keyboard is the core feature that makes Grammarly work across all your apps on iPad. Here is how to enable and set it up:
Enabling the Grammarly Keyboard
- Open the Grammarly app on your iPad.
- When prompted, tap Enable Grammarly Keyboard.
- You will be redirected to the iPadOS Settings app.
- Tap Keyboards, then tap Add New Keyboard.
- Select Grammarly from the list of third-party keyboards.
- Tap on Grammarly again and enable Allow Full Access.
Understanding Full Access
Full Access is a required permission that allows the Grammarly Keyboard to send your typing to Grammarly’s servers for analysis. Without Full Access enabled, the keyboard cannot provide writing suggestions. Some users have privacy concerns about this permission, but Grammarly states that the data is used solely to provide writing suggestions and is processed according to their privacy policy. If you prefer not to enable Full Access, you can still use the Grammarly Editor within the app for document editing, but the keyboard will not function in other applications.
Switching to the Grammarly Keyboard
Once enabled, switching to the Grammarly Keyboard is straightforward:
- Open any app with a text field (Mail, Notes, Pages, etc.).
- Tap the text field to bring up the keyboard.
- Look for the globe icon on the bottom left of the keyboard.
- Tap the globe icon to cycle through your keyboards.
- Select Grammarly (indicated by the green G icon).
You can also tap and hold the globe icon to see a list of all your keyboards and select Grammarly directly.
How to Access Grammarly via Safari and Browser
If you prefer not to install the app or want to use Grammarly in a browser environment, you can access Grammarly through Safari on your iPad. This method works well for users who primarily write in web-based applications like Google Docs, webmail clients, or online document editors.
To access Grammarly through Safari, simply navigate to grammarly.com and log into your account. The website will prompt you to enable the Grammarly companion extension if you want the browser to check your writing as you type on websites. Note that Safari extensions for Grammarly have limited functionality compared to the dedicated app, and you may experience login issues on some versions of iPadOS.
For the best experience on iPad, the dedicated app provides more reliable keyboard functionality and a better-optimized writing environment than browser-based access. However, having both options available gives you flexibility depending on your writing context.
Using the Grammarly Editor on iPad
The Grammarly Editor is a dedicated writing space within the app that offers more advanced features than the keyboard alone. Here is how to make the most of it:
Accessing the Grammarly Editor
- Open the Grammarly app on your iPad.
- Tap My Grammarly at the bottom of the screen.
- You will see options for Go to Editor and Create New Document.
- Tap to open the editor or create a new document.
Editor Features
The Grammarly Editor provides several features designed to improve your writing:
- Grammar and Spelling Checks: The editor automatically underlines potential errors in green (grammar) and blue (spelling).
- Clarity Suggestions: Premium users get suggestions for making sentences clearer and more concise.
- Tone Detection: The editor analyzes your writing tone and suggests adjustments for formal or informal contexts.
- Synonym Suggestions: Tap on any word to see alternative suggestions that might better fit your context.
- Document Management: Create, save, and organize your documents within the app.
It is important to note that some advanced GenAI features available in the browser version, such as the “Improve it” button for one-click rewriting, are not fully available in the Grammarly Editor on iPad. Users on Reddit have reported this as a limitation of the iPad experience compared to the desktop or mobile browser versions.
Using Grammarly with Magic Keyboard and Physical Keyboards
Many iPad users prefer typing with a physical keyboard like the Magic Keyboard, Smart Keyboard, or a Bluetooth keyboard. Grammarly supports physical keyboards, though the experience differs slightly from on-screen typing.
Setting Up with Magic Keyboard
When using a Magic Keyboard or other physical keyboard with your iPad, follow these steps to activate Grammarly suggestions:
- Connect your Magic Keyboard to your iPad via Bluetooth or the Smart Connector.
- Open the Grammarly app and go to My Grammarly.
- Tap Go to Editor to open a document.
- Alternatively, switch to the on-screen Grammarly Keyboard briefly to activate it.
- When using a physical keyboard, type your content in any text field.
- After finishing a section, look for the Check my text button that appears.
- Tap Check my text to receive Grammarly suggestions.
Important Limitation
When using a physical keyboard exclusively, the Grammarly Keyboard does not automatically appear. Users report that you need to switch to the on-screen Grammarly Keyboard at least once to activate Grammarly functionality. After that, you can use your physical keyboard, but you will need to manually trigger the check by tapping the “Check my text” button or switching back to the on-screen keyboard periodically.
Some users have reported that on iPadOS 18 beta versions, the Magic Keyboard functionality can be inconsistent, with the keyboard not appearing or Grammarly suggestions not triggering properly. If you experience these issues, try switching to the on-screen Grammarly Keyboard first to re-establish the connection.
Troubleshooting Common Grammarly Issues on iPad
Like any app, Grammarly can encounter issues on iPad. Here are solutions to the most common problems:
Grammarly Keyboard Not Appearing
If the Grammarly Keyboard does not show up when you tap the globe icon:
- Go to Settings > General > Keyboard > Keyboards.
- Verify that Grammarly is listed as an active keyboard.
- Tap on Grammarly and ensure Full Access is turned on.
- Restart your iPad and try again.
- Check that you are running iOS 17 or iPadOS 17 or later.
Grammarly App Crashing or Freezing
Users have reported that the Grammarly app can crash or freeze, especially during extended typing sessions. If this happens:
- Force close the Grammarly app and reopen it.
- Check for app updates in the App Store, as newer versions often fix stability issues.
- Clear the app cache by uninstalling and reinstalling if crashes persist.
- Ensure your iPad has sufficient available storage space.
Suggestions Not Appearing
If Grammarly is not providing suggestions as you type:
- Verify that the Grammarly Keyboard is selected (look for the green G icon).
- Ensure you have granted Full Access permission in Settings.
- Check your internet connection, as Grammarly requires online access to process suggestions.
- Try switching keyboards and back to refresh the connection.
GenAI Features Not Working
If premium GenAI features like “Improve it” are not functioning:
- Verify that you have an active Grammarly Premium subscription.
- Note that some GenAI features may only be available in the browser version, not the iPad app.
- Try accessing Grammarly through Safari at grammarly.com for full feature access.
Login and Authentication Issues
Some users experience login problems when accessing Grammarly via Safari on iPad. If you cannot log in:
- Clear your Safari browser cache and cookies.
- Try using a different browser like Chrome or Firefox.
- Ensure JavaScript is enabled in your browser settings.
- Check that grammarly.com is allowed to use cookies in your privacy settings.
Tips for Getting the Most Out of Grammarly on iPad
Here are expert tips to help you maximize Grammarly’s value on your iPad:
- Use the Keyboard Everywhere: Once Grammarly Keyboard is enabled, switch to it whenever you write, whether in Mail, Notes, Google Docs, or any app with text fields. Consistent use builds better writing habits.
- Enable Auto-Dismiss: In the Grammarly app settings, enable the option to automatically dismiss accepted suggestions, keeping your writing flow uninterrupted.
- Use with Apple Pages: While not officially integrated, you can copy text from Pages to the Grammarly Editor for checking, or use the Grammarly Keyboard when typing in Pages by switching keyboards.
- Review All Suggestions: Do not just accept the first suggestion. Take time to understand why Grammarly flagged something to improve your own writing skills over time.
- Customize Your Goals: Set your writing goals in the Grammarly app, including audience type, formality level, and intent, to get more relevant suggestions.
- Keep the App Updated: Grammarly regularly releases updates that improve functionality and fix bugs. Keep the app updated through the App Store for the best experience.
- Combine Keyboard and Editor: Use the Grammarly Keyboard for quick typing in any app, and switch to the Grammarly Editor for longer documents where you want more focused writing assistance.
- Check Before Sending: Before sending important emails or submitting documents, do a final check using the Grammarly Editor or the “Check my text” feature to catch any remaining issues.
Frequently Asked Questions
Is Grammarly Keyboard available for iOS and iPadOS?
Yes, the Grammarly Keyboard is available for both iOS (iPhone) and iPadOS (iPad). The app requires iOS 17 or newer and iPadOS 17 or newer for full functionality.
Does Grammarly work with Magic Keyboard on iPad?
Yes, Grammarly works with Magic Keyboard and other physical keyboards. However, you may need to activate the on-screen Grammarly Keyboard first to enable Grammarly functionality. After that, you can use your physical keyboard, but you will need to manually trigger suggestions using the “Check my text” button.
What is the disadvantage of using Grammarly on iPad?
Some limitations of using Grammarly on iPad include the requirement for Full Access permission (which raises privacy concerns for some users), potential app crashes during extended use, and limited GenAI features compared to the browser version. Some advanced features like one-click “Improve it” rewriting are not available in the iPad Editor.
How do I add Grammarly to my keyboard on iPad?
To add Grammarly to your keyboard, download the Grammarly app from the App Store, open it, and follow the prompts to enable the Grammarly Keyboard. Then go to Settings > General > Keyboard > Keyboards > Add New Keyboard and select Grammarly. You will also need to enable Full Access for the keyboard to function.
Why is my Grammarly not working properly on iPad?
If Grammarly is not working on your iPad, try these steps: ensure you have granted Full Access permission, check that you have an internet connection, restart the app and your iPad, ensure the Grammarly Keyboard is selected, and verify you are running iOS 17 or iPadOS 17 or later.
Is Grammarly good for dyslexia?
Grammarly can be helpful for users with dyslexia by highlighting potential spelling and grammar errors. However, it should be used as a supplementary tool and not as a replacement for other dyslexia-specific support. The suggestions can help users learn correct patterns over time.
What is the best grammar checker for iPad?
Grammarly is one of the most popular grammar checkers for iPad due to its comprehensive features, real-time suggestions, and cross-app keyboard functionality. Other options include Apple Intelligence writing tools (built into iPadOS 17 and later) and Ginger Grammar Checker. Grammarly stands out for its advanced AI features and consistency across platforms.