
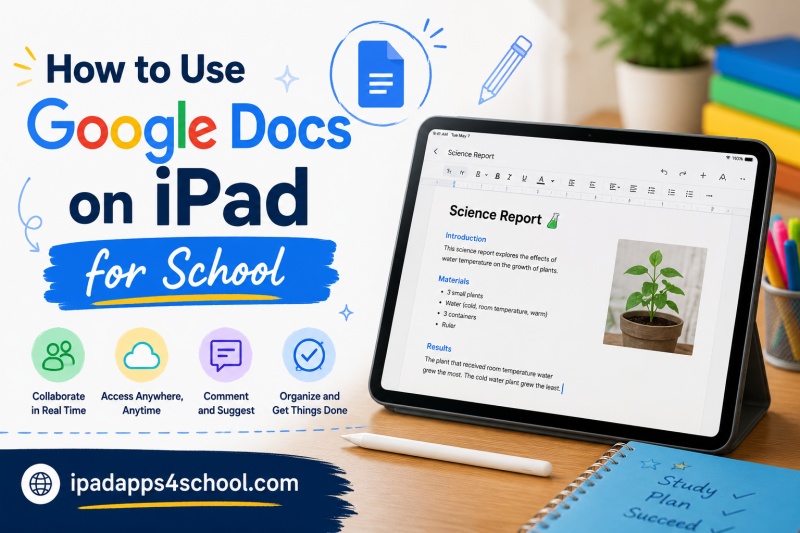
Learning how to use Google Docs on iPad for school can transform your tablet from a entertainment device into a powerful academic tool. I spent my first semester of college trying to figure out the best workflow, and after hundreds of assignments, I have got the system down.
Whether you are writing essays, collaborating on group projects, or taking notes in class, this guide covers everything you need to know. You will learn the differences between the app and browser versions, essential keyboard shortcuts, offline workarounds, and how to integrate with Google Classroom.
By the end, you will have a complete system for using Google Docs iPad that actually works for real schoolwork.
Table of Contents
Getting Started: App vs Browser
The first decision you need to make is whether to use the Google Docs iPad app or the browser version. Both have their place, and I actually switch between them depending on what I am doing.
The Google Docs App
The dedicated app works best for quick edits, checking documents on the go, and offline access. It is optimized for touch, so text selection and scrolling feel more natural. The app also supports Apple Pencil for handwriting notes directly in your documents.
However, the app has limitations. Some advanced formatting options are missing, and you cannot access certain features like the equation editor or script editor. If you are writing a complex research paper with lots of formatting requirements, you might hit walls.
The Browser Version (Safari or Chrome)
Using Google Docs in Safari or Chrome gives you the full desktop experience. Every formatting tool is available, and the interface looks exactly like what you would see on a laptop. This is my go-to for serious writing sessions.
The tradeoff is that touch interaction feels clunkier. Text selection requires more precision, and some buttons are small for finger tapping. If you have an external keyboard and trackpad, the browser version becomes much more usable.
My recommendation: Download the app for quick access and offline work, but bookmark the browser version for heavy editing sessions. Use both strategically.
How to Use Google Docs on iPad: Basic Editing
Once you have chosen your platform, let us cover the fundamentals of how to use Google Docs on iPad for actual schoolwork.
Creating and Opening Documents
Open the Google Docs app and tap the plus icon to create a new document. You can choose from a blank document or various templates including resumes, letters, and project proposals. For school assignments, I usually start blank.
To open existing documents, browse your recent files or use the search function. Everything syncs automatically with your Google Drive, so documents you started on your laptop will appear instantly on your iPad.
Text Selection and Editing
Text selection on a touch screen takes practice. Double-tap a word to select it. Triple-tap to select an entire paragraph. Drag the blue handles to expand your selection.
Once text is selected, the formatting toolbar appears. You can make text bold, italic, or underlined. Change fonts, sizes, and colors. Add bullet points or numbered lists for outlines.
For school papers, pay attention to paragraph spacing. Most teachers want double-spaced essays. Tap the line spacing button (it looks like lines with arrows) and select 2.0 for double spacing.
Formatting for School Assignments
Different assignments require different formatting. For MLA-style papers, you need 12-point Times New Roman font, double spacing, and 1-inch margins. For APA, the font is usually 12-point Times New Roman or 11-point Arial, also double-spaced.
Access these settings through the Format menu. Set your margins to 1 inch on all sides. Choose your font and size. Getting this right from the start saves you from reformatting later.
Productivity Tips for Students
Now let us make you faster. These are the tricks that separate efficient students from those who struggle with the iPad interface.
Essential Keyboard Shortcuts
If you have an external keyboard connected, these shortcuts will speed up your workflow dramatically:
- Cmd+B: Bold
- Cmd+I: Italic
- Cmd+U: Underline
- Cmd+Z: Undo
- Cmd+Shift+Z: Redo
- Cmd+C: Copy
- Cmd+V: Paste
- Cmd+A: Select all
- Cmd+F: Find
- Cmd+S: Save (though Docs auto-saves)
Learning just these ten shortcuts will save you hours over a semester. I use Cmd+B and Cmd+I constantly when formatting essays.
Trackpad and Mouse Gestures
With iPadOS, you can use a trackpad or mouse for more precise control. A two-finger swipe scrolls through documents. Three-finger swipes let you undo or redo. Pinch gestures zoom in and out.
If you have a Magic Keyboard or similar accessory with a trackpad, the cursor transforms into a precise pointer when over text. This makes selecting specific words much easier than using your finger.
Apple Pencil and Scribble Support
If you have an Apple Pencil, you can handwrite notes directly in Google Docs using the Scribble feature. Enable Scribble in your iPad settings, then write in any text field and it converts to typed text automatically.
This is perfect for quick annotations or when you prefer writing by hand but need the document in digital form. I use this for brainstorming essay outlines before typing the final version.
Voice Typing and Dictation
Your iPad has built-in dictation that works in Google Docs. Tap the microphone icon on your keyboard and start speaking. This is great for getting ideas down quickly or if you type slowly.
For best results, speak clearly and use punctuation words like “period” and “comma.” The accuracy is surprisingly good in quiet environments.
School-Specific Features and Workflows
Here is where this guide differs from generic tutorials. Let us talk about using Google Docs specifically for school success.
Google Classroom Integration
Many schools use Google Classroom for assignment distribution and submission. Here is how to use Google Docs in Google Classroom for students:
When your teacher posts an assignment with a Google Doc attached, tap it to open. The document will be automatically copied to your Drive with your name added. Complete the assignment directly in that document.
When finished, return to Google Classroom and tap “Turn In.” The document submits automatically. Your teacher can see your work, add comments, and return it with a grade.
Important: Do not share the document separately or email it. Always submit through Google Classroom so it is properly tracked.
Collaborating on Group Projects
Group projects become much easier with Google Docs. Create a document and share it with your group members. Everyone can edit simultaneously from their own devices.
Use the comment feature to discuss sections without cluttering the document. Highlight text and tap the comment icon to add suggestions. Tag teammates with @ followed by their name to notify them.
Version history lets you see who changed what and when. If someone accidentally deletes content, you can restore previous versions. Access this through File > Version history.
Working with Teacher Feedback
When teachers return assignments, they often leave comments and suggestions. These appear as highlighted sections with comment bubbles in the margin. Tap each comment to read the feedback.
You can reply to comments directly, creating a conversation thread about specific parts of your work. Once you have addressed the feedback, mark comments as resolved to keep the document clean.
Take time to read all feedback before making changes. Understanding why something needs revision helps you improve faster than just fixing errors.
Formatting Academic Papers
Different subjects require different citation styles. For MLA papers, you need a header with your last name and page number in the top right. Use Insert > Header and page numbers to set this up.
For APA papers, you need a running head and page number. The title page has specific requirements too. Check your assignment guidelines carefully and use Google Docs formatting tools to match the requirements exactly.
Create a template document with your preferred formatting and duplicate it for each assignment. This saves setup time and ensures consistency.
Multitasking: Split View and Slide Over
One of the iPad’s biggest advantages over laptops for schoolwork is multitasking. Here is how to research and write simultaneously.
Split View for Research
Open Safari with your research sources on one side and Google Docs on the other. Swipe up from the bottom to see open apps, then drag Safari to the left or right edge of the screen.
Now you can read sources and type notes without switching apps. Drag the divider to adjust the split. I usually give Safari more space when reading, then expand Docs when writing.
Slide Over for Quick Reference
For quick lookups, use Slide Over instead of Split View. Drag an app slightly into the screen but not to the edge. It floats as a narrow window over your main app.
This is perfect for checking a citation style guide or looking up a quick fact without leaving your document. Swipe the Slide Over window off-screen when you do not need it.
Stage Manager for Advanced Workflows
On newer iPads with Stage Manager, you can have multiple resizable windows open at once. Arrange your research, outline, and document side by side. This is overkill for simple assignments but powerful for research papers.
Drag and Drop Between Apps
Select text or images in Safari and drag them directly into your Google Doc. This works for quotes, images, and even entire paragraphs. It is faster than copy-paste and keeps your formatting intact.
You can also drag files from the Files app into Google Docs to insert them as images or links.
Collaboration and Offline Work
These features matter whether you are working with classmates or alone on a long bus ride.
Real-Time Collaboration
Multiple people can edit the same document simultaneously. You will see their cursors as colored lines with their names. Changes appear instantly for everyone.
This is perfect for group study guides, shared note-taking, and collaborative projects. I have used it for everything from lab reports to planning school events.
Use the presence indicator to see who is currently viewing the document. If someone is not contributing, you can send them a message.
Comments and Mentions
Comments are the best way to discuss documents without changing the text. Add comments by selecting text and tapping the comment icon. Reply to existing comments to keep conversations organized.
Mention someone by typing @ followed by their email or name. They will receive a notification about your comment. This is how I request feedback from teachers and classmates.
Sharing Documents
Tap the share button to invite others to view or edit your document. You can share via link or invite specific people by email.
Set permissions carefully. Choose “Viewer” for read-only access, “Commenter” for people who can suggest changes, or “Editor” for full access. For schoolwork, I usually give teachers comment access and group members editor access.
Disable link sharing when the project is done to maintain privacy.
Working Offline
Google Docs works offline on iPad, which is essential for long commutes or school bus rides without WiFi. Here is how to set it up:
Open the Google Docs app while connected to WiFi. Tap the three dots next to any document and select “Available offline.” The document downloads to your device.
You can now edit without an internet connection. Changes sync automatically when you reconnect. Check which documents are available offline in the “Offline” section of the app.
Enable offline for documents you are actively working on. Remove offline access for old documents to save storage space.
Fixing Common Issues
Even the best tools have problems. Here is how to fix the most common Google Docs iPad issues.
Laggy Performance
If Google Docs is laggy on your iPad, try these fixes:
Close other apps running in the background. Double-tap the home button or swipe up from the bottom and swipe away apps you are not using.
Clear your browser cache if using the web version. In Safari, go to Settings > Safari > Clear History and Website Data.
Reduce document complexity. Documents with hundreds of images or extremely long text can slow things down. Split large projects into multiple documents.
Update your apps and iOS. New versions often include performance improvements.
Sync Issues
If changes are not syncing, check your internet connection first. Google Docs needs connectivity to sync.
Force close the app and reopen it. Sometimes the sync process just needs a restart.
Check that you are signed into the correct Google account. Tap your profile picture in the app to verify.
Formatting Problems
If formatting looks wrong, make sure you are using the same version (app or browser) that created the document. Some formatting does not translate perfectly between them.
Use the Clear formatting option to remove problematic formatting and start fresh. Select all text, then tap Format > Clear formatting.
Frequently Asked Questions
Can you run Google Docs on an iPad?
Yes, you can run Google Docs on an iPad. Download the free Google Docs app from the App Store, or use Safari or Chrome to access the browser version. Both methods work well for creating, editing, and sharing documents.
Can my school see what I write on Google Docs?
If your school provided your Google account, administrators may have access to your documents through admin tools. For personal Google accounts, schools can only see documents you explicitly share with them. Check your school’s acceptable use policy for specifics. Private documents in personal accounts remain private unless shared.
How to use Google Docs in Google Classroom for students?
When teachers post assignments in Google Classroom with Google Docs attached, tap the assignment to open the document. It automatically copies to your Drive. Complete your work directly in that document, then return to Google Classroom and tap Turn In to submit. Your teacher can then review, comment, and grade your work.
Why is Google Docs so laggy on iPad?
Google Docs may lag on iPad due to having too many apps open, using an outdated app version, working with very large documents, or browser cache issues. Close background apps, update Google Docs and iOS, clear Safari cache if using the browser, and consider breaking large documents into smaller sections.
Is Google Docs free on iPad?
Yes, Google Docs is completely free on iPad. Download it from the App Store at no cost. You need a free Google account to use it. All features including editing, collaboration, and offline access are included without any subscription required.
Conclusion
Mastering how to use Google Docs on iPad for school takes some practice, but the payoff is worth it. You have got a powerful writing tool that syncs across all your devices, works offline when needed, and integrates seamlessly with Google Classroom.
Remember the key principles: use the app for quick edits and offline access, switch to the browser for serious formatting work, learn those keyboard shortcuts, and take advantage of multitasking features like Split View.
Whether you are writing a simple homework assignment or a complex research paper, Google Docs iPad has the features you need. Start with the basics, add shortcuts and workflows as you get comfortable, and soon you will be working more efficiently than ever.
Your iPad is not just for entertainment. With Google Docs and the tips in this guide, it is a legitimate school machine.