
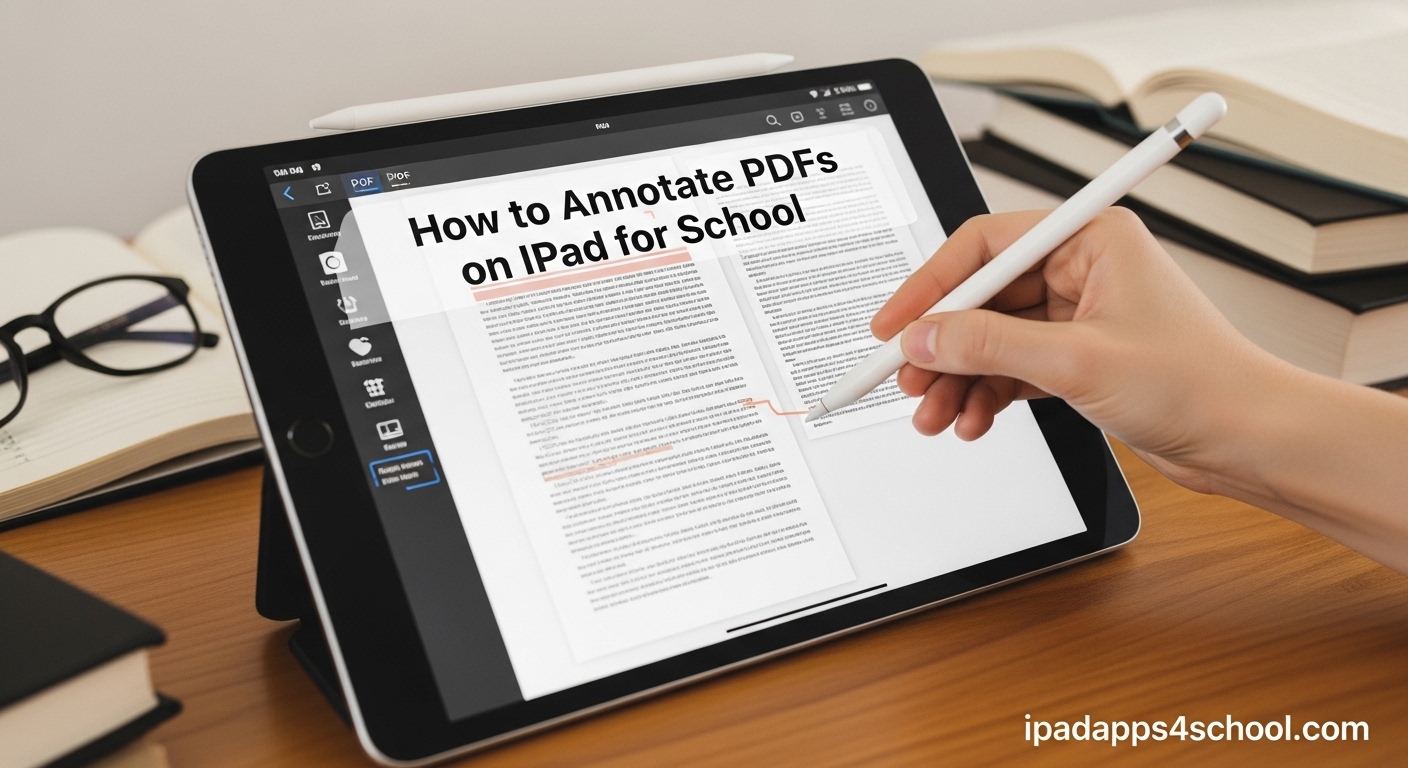
Annotating PDFs on your iPad transforms how you study, take notes, and complete assignments. Whether you are highlighting textbook chapters, marking up lecture slides, or collaborating on group projects, the right annotation workflow saves hours of frustration and helps information stick better. I have tested every native method and major third-party app to bring you the complete guide for students in 2026.
Your iPad comes with powerful built-in tools that most students never fully discover. You can highlight, draw, add text, and even sign documents without downloading a single app. For those who need advanced features, excellent free and paid alternatives exist that integrate seamlessly with your school workflow.
This guide covers everything from basic finger markup to advanced Apple Pencil techniques. We will walk through native iPad methods first, then explore third-party apps, school-specific workflows, and pro tips I have learned from three years of digital note-taking. If you are looking for more ways to optimize your device, check out these iPad hidden features for students that complement your PDF annotation workflow.
Table of Contents
Can You Annotate a PDF on an iPad?
Yes, you can absolutely annotate PDFs on an iPad using built-in features that require no additional apps. Apple has integrated PDF markup capabilities directly into iPadOS through the Preview app, Files app, and Notes app. Every iPad running iPadOS 15 or later comes with these tools pre-installed and ready to use.
The native annotation features include highlighting text, underlining, adding strikethrough, drawing freehand, inserting shapes, adding text boxes, and creating signatures. You can work with PDFs stored in iCloud Drive, received via email, downloaded from your school’s learning management system, or opened from any app that supports document sharing.
For students, this means you can start annotating immediately after unboxing your iPad. You do not need to spend money on apps or learn complicated software. The built-in tools handle 80% of typical school annotation needs, from marking up syllabi to highlighting research papers.
Native iPad Methods for PDF Annotation
Apple provides three primary ways to annotate PDFs without installing anything extra. Each method suits different scenarios, and understanding all three gives you flexibility depending on your task.
Using the Preview App
The Preview app offers the most comprehensive native PDF annotation experience on iPad. When you open any PDF file, Preview automatically provides a full set of markup tools through its clean, intuitive interface.
Step 1: Open your PDF
Tap any PDF file in Files, email, or Messages. The Preview app launches automatically. If another app opens instead, tap the share button and select Preview from the app options.
Step 2: Access the Markup toolbar
Look for the marker tip icon in the top-right corner of the screen. Tap it to reveal the full markup toolbar. This toolbar contains all your annotation tools organized into logical groups.
Step 3: Select text for highlighting
Drag your finger or Apple Pencil across any text to select it. A popup menu appears with options including Highlight, Underline, and Strikethrough. Tap your preferred option to apply the formatting instantly.
Step 4: Add freehand drawings
Tap the pen tool in the markup toolbar. Choose from pen, marker, or pencil styles, each with adjustable thickness and opacity. Draw directly on the PDF to circle important sections, draw arrows, or sketch diagrams.
Step 5: Insert shapes and signatures
The plus button in the toolbar opens options for adding text boxes, signatures, shapes, and arrows. Create your signature once using your finger or Apple Pencil, then insert it anywhere on any document. This feature proves invaluable for signing permission slips, field trip forms, or digital contracts.
Step 6: Save your changes
Tap Done to save annotations directly to the original file. Preview automatically preserves your markup, and the annotated PDF is ready to share or submit.
Annotating in the Files App
The Files app provides the fastest way to mark up PDFs when you need quick edits without opening a dedicated annotation app. This method works perfectly for last-minute homework checks or quick teacher feedback.
Step 1: Locate your PDF
Open the Files app and navigate to your PDF location. This could be iCloud Drive, On My iPad, or any connected cloud storage like Google Drive or Dropbox if you have those apps installed.
Step 2: Long-press for Quick Actions
Press and hold the PDF file icon until a menu appears. Select Quick Actions from the menu options. This reveals a submenu of immediate actions you can take.
Step 3: Choose Markup
Tap Markup to enter annotation mode. The familiar markup toolbar appears at the bottom of the screen with all the same tools available in Preview.
Step 4: Annotate and save
Add your highlights, notes, or drawings. Tap Done when finished. Files saves your annotated version back to the original location, overwriting the previous unmarked file or creating a copy depending on your settings.
This method shines when you receive PDFs through AirDrop during class or find documents while browsing your files. You can annotate immediately without disrupting your workflow by switching between multiple apps.
Working with PDFs in Notes App
The Notes app transforms PDF annotation into a powerful organizational system for students. Unlike Preview and Files, Notes lets you embed PDFs within your notebooks, combine them with handwritten notes, and organize everything by subject or project.
Step 1: Create or open a note
Open the Notes app and navigate to the folder where you want to store your annotated PDF. Create a new note or open an existing one. Consider creating folders for each class or semester to keep materials organized.
Step 2: Insert the PDF
Tap the camera icon in the toolbar above your keyboard. Select Scan Documents if you are capturing a physical paper, or choose the document picker to import an existing PDF from Files. Navigate to your PDF and select it.
Step 3: Annotate directly on the PDF
Once inserted, the PDF appears as an interactive element within your note. Tap it to enter full annotation mode. The markup toolbar appears with all standard tools. Use your finger or Apple Pencil to highlight, draw, and add text.
Step 4: Add context around the PDF
The magic of Notes happens here. You can type text above, below, or beside your embedded PDF. Add lecture summaries, assignment instructions, or your own analysis. Combine typed notes with handwritten annotations using Apple Pencil for maximum flexibility.
Step 5: Organize by subject
Create folders in Notes for each class: Biology 101, English Literature, Calculus II. Move annotated notes into appropriate folders. Use the search function to find specific annotations across all your notes instantly.
Step 6: Collaborate with classmates
Tap the share button to invite classmates to view or edit your annotated PDFs. Work together on group projects, share study guides, or divide research paper review duties. Changes sync in real-time across all participants’ devices.
How to Annotate PDFs with Apple Pencil
Apple Pencil transforms PDF annotation from functional to exceptional. The pressure sensitivity, palm rejection, and precision tip make handwritten markup feel natural and professional.
Setting Up Apple Pencil for Annotation
Pair your Apple Pencil by attaching it magnetically to the side of your iPad (2nd generation) or plugging it into the Lightning port (1st generation). The pairing happens automatically. No additional setup is required for PDF annotation.
Pressure sensitivity means your strokes vary naturally just like real pens and pencils. Press harder for bold emphasis or lighter for subtle notes. This feature works in all native markup tools and most third-party apps.
Double-Tap Tool Switching
Apple Pencil 2nd generation includes a double-tap gesture on the flat side. Configure this in Settings > Apple Pencil > Double Tap. I recommend setting it to switch between current tool and eraser for annotation work. This saves countless taps when correcting mistakes.
Handwriting Recognition
iPadOS includes Scribble, which converts your handwriting to typed text in any text field. Double-tap a text box in a PDF form, write with Apple Pencil, and watch your handwriting transform into typed words. This feature works in Preview markup text boxes and any app supporting Apple Pencil input.
Best Practices for Note-Taking
Hold the Pencil like a regular pen at a natural angle. Rest your palm on the screen; palm rejection prevents accidental marks. Use the highlighter tool with light pressure to create translucent highlighting that preserves text readability. Switch pen colors to create visual coding systems: yellow for definitions, blue for questions, pink for important dates.
Zoom in using a two-finger pinch when writing small notes in margins. The precision tip allows legible handwriting even at reduced sizes. Zoom out to see the full page context before saving.
How to Annotate a PDF on iPad Without Apple Pencil
You can annotate PDFs effectively using just your finger, though some advanced features work less smoothly. Every native annotation tool supports finger input, making this approach completely viable for students without stylus access.
Finger Annotation Methods
Tap and hold on text to activate selection mode. Drag the blue handles to expand your selection across sentences or paragraphs. The popup menu offers Highlight, Underline, and Strikethrough options. These text formatting tools work identically with finger or Pencil input.
For freehand drawing, tap the pen tool and use your finger like a stylus. The experience differs from Apple Pencil in two ways: no pressure sensitivity means uniform line thickness, and your finger blocks more screen visibility. Zoom in generously before drawing to compensate for reduced precision.
On-Screen Markup Tools
The markup toolbar remains fully accessible with finger input. Tap any tool icon to activate it. Adjust pen thickness and color using the sliders that appear. The eraser tool works by dragging your finger across marks you want to remove.
Adding text boxes, shapes, and signatures happens through the plus button menu. Tap to place elements, then drag to reposition. Resize using the corner handles that appear when an element is selected.
Limitations Compared to Pencil
Finger annotation lacks pressure sensitivity, making handwriting look uniform and less natural. Fine details prove challenging because fingertips are larger than Pencil tips. Extended finger writing causes hand fatigue faster than holding a stylus.
Palm rejection does not exist for finger input, so you must lift your hand completely while writing. This feels unnatural compared to resting your wrist while writing on paper.
Stylus Alternatives
Third-party styluses from brands like Logitech Crayon offer middle-ground solutions. They provide better precision than fingers at lower cost than Apple Pencil. Most lack pressure sensitivity but include palm rejection. Any stylus compatible with your iPad generation improves the annotation experience over finger input.
Best Third-Party PDF Annotation Apps for Students
While native tools handle basic needs, third-party apps unlock advanced features like handwriting search, audio recording, and sophisticated organization. Here are the best options for students in 2026.
GoodNotes 6
GoodNotes 6 stands as the gold standard for student PDF annotation. The app combines powerful handwriting recognition with intuitive notebook organization.
The handwriting search feature finds any word you have written across all your notebooks. Search for “photosynthesis” and instantly locate that biology lecture from three months ago. This feature works even with messy handwriting, saving hours of manual searching.
Folder organization mimics physical binders. Create dividers for semesters, folders for classes, and individual notebooks for units or topics. Import PDFs directly into notebooks where they sit alongside your handwritten notes.
The lasso tool selects handwritten content and converts it to typed text, resizes it, or changes colors. This flexibility lets you reorganize your thinking after the fact. Math conversion recognizes handwritten equations and transforms them into typed mathematical notation.
GoodNotes 6 operates on a freemium model. The free version includes three notebooks with full features. Unlimited notebooks require a subscription or one-time purchase. For serious students, the paid version pays for itself in organization and search capabilities.
Notability
Notability differentiates itself through audio recording synced to your notes. Record lectures while annotating PDFs, then tap any note to hear exactly what was said when you wrote it.
This feature transforms how you study. During review sessions, unclear notes become clear when you hear the professor’s explanation again. The audio syncs to your exact position on the page, not just the time, creating precise context.
Math conversion in Notability handles complex equations better than most competitors. Write calculus expressions, chemical formulas, or physics equations naturally. The app recognizes symbols, fractions, and formatting.
The interface uses a sidebar organization system that some students prefer over GoodNotes’ binder approach. PDFs import as individual pages you can annotate alongside or between your own notes.
Notability offers a free version with basic features. The premium subscription unlocks unlimited edits, iCloud sync, and advanced export options.
PDF Expert
PDF Expert targets students who need professional-grade PDF manipulation beyond simple annotation. The app excels at form filling, document merging, and optical character recognition.
OCR capabilities convert scanned PDFs into searchable documents. Import a scanned textbook chapter, run OCR, and search for specific terms within the image-based PDF. This feature proves invaluable for older documents or photos of whiteboard notes.
Professional markup tools include advanced highlighting with comment attachments, strikethrough with revision notes, and stamp tools for approval workflows. The annotation summary exports all your marks as a separate document for review.
PDF Expert handles large documents smoothly. Textbooks with hundreds of pages scroll without lag. Split-screen support lets you view two sections simultaneously or compare documents side by side.
The app requires a subscription for full features, though a one-time purchase option exists for basic annotation. Students working extensively with research papers and scanned documents find the premium features worth the investment.
Free Options: Xodo and Adobe Acrobat Reader
Budget-conscious students have excellent free alternatives that handle most annotation needs without subscription costs.
Xodo PDF Reader offers surprising depth for a free app. Highlight, underline, strikethrough, and freehand drawing work flawlessly. Text boxes, signatures, and shapes round out the annotation toolkit. Cloud sync connects to Google Drive, Dropbox, and OneDrive automatically.
Xodo includes form filling capabilities and basic editing like page reordering and rotation. The interface feels less polished than paid alternatives but functions reliably. For students who need annotation without advanced organization, Xodo delivers excellent value.
Adobe Acrobat Reader provides the most reliable rendering of complex PDFs. Documents with unusual formatting, embedded fonts, or intricate layouts display correctly when other apps struggle. The annotation tools cover all basics: highlight, comment, draw, add text.
Adobe’s ecosystem integration matters for students in design or media programs. PDFs move seamlessly between iPad, desktop, and web versions. Comment syncing across devices keeps group projects coordinated.
Both free options include advertisements or feature limitations compared to paid versions. Xodo shows occasional promotional banners. Adobe reserves advanced features like OCR and export for premium subscribers. For basic school annotation, these limitations rarely impede workflow.
School-Specific PDF Annotation Workflows
Generic tutorials miss the specific challenges students face daily. These workflows address real school scenarios from lecture halls to study groups.
Annotating Lecture Slides and Handouts
Professor PowerPoints distributed before class become interactive study tools with the right annotation strategy. Import slides into your preferred app before lecture begins. During class, add your own notes in margins, circle emphasized points, and mark sections the professor says will be on exams.
The color-coding system saves review time later. Use yellow highlighting for key concepts the professor repeats. Blue ink captures your own questions or connections to other material. Red marks anything labeled as exam content. This visual system lets you scan slides quickly when studying.
Handouts received via email or learning management systems download directly to Files. Annotate immediately while the context is fresh. Waiting until later means missing the connections you made during the original presentation.
Textbook and Reading Annotation
Digital textbooks in PDF format allow annotation that physical books cannot match. Highlight key definitions, add margin summaries in your own words, and link concepts across chapters using bookmarks or internal links.
The margin note technique improves comprehension. After highlighting a paragraph, add a brief summary in your own words in the margin. This forces processing beyond passive highlighting. Export these annotated pages as study guides before exams.
Many textbook PDFs include interactive elements like quizzes or review questions. Annotate your answers directly in the document for future reference. Some apps let you hide and reveal your answers for self-testing.
Research Paper Markup
Academic papers require different annotation strategies than lecture notes. Focus on methodology sections, results, and discussion points relevant to your assignments.
Create a citation tracking system. When you highlight a quote or statistic you might use, add a margin note with the citation format you need. This saves hours during bibliography creation. Color-code by theme: blue for methodology, green for supporting evidence, yellow for counter-arguments.
Share annotated papers with study groups using collaboration features. Each member highlights different aspects, then combine insights during group review sessions. Export annotation summaries to create shared literature review documents.
Organizing Annotated PDFs by Subject
Without organization, annotated PDFs become an unsearchable mess. Implement a system early in the semester to prevent digital chaos.
Create folder structures that mirror your course schedule. Top-level folders for each class: Biology 101, English Composition, History 205. Subfolders by unit or assignment type: Lecture Notes, Readings, Assignments, Exams.
Use consistent naming conventions. Include date, topic, and document type: 2026-01-15_Photosynthesis_Lecture.pdf. This makes searching easier and keeps files chronologically sorted.
Cloud sync ensures your annotations survive device problems. iCloud, Google Drive, or Dropbox integration keeps files backed up automatically. For important projects, export annotated PDFs periodically as insurance against sync failures.
Tagging systems in apps like GoodNotes add another organization layer. Tag all exam-related content with “Exam1” for quick review compilation. Use subject-specific tags like “OrganicChem” or “Shakespeare” for cross-course searching.
If you want to master multitasking while annotating, explore these iPad multitasking tips for school that pair perfectly with PDF annotation workflows.
Tips for Effective PDF Annotation on iPad
After years of digital note-taking, I have learned strategies that separate useful annotations from digital clutter.
Develop a Color Coding System
Assign specific meanings to colors and stick with them. My system: yellow for definitions, blue for questions I need to ask, green for connections to other topics, pink for exam material, purple for personal reactions. This consistency lets me scan documents and instantly understand my past thinking.
Consistent Highlighting Strategy
Highlighting everything highlights nothing. Limit yourself to one or two key points per page. If you find yourself highlighting entire paragraphs, you are not processing deeply enough. Summarize in your own words instead.
Use Shapes for Emphasis
Circles, arrows, and boxes draw attention more effectively than highlighting alone. Circle key terms the first time they appear. Draw arrows connecting related concepts across pages. Box formulas or equations you need to memorize.
Know When to Type vs Write
Typed notes work better for quotes, definitions, and citations you need to copy exactly. Handwritten notes suit your own analysis, questions, and summaries. Mix both based on content type.
Backup Strategies
Technology fails at the worst moments. Export important annotated PDFs to cloud storage weekly. For critical documents like thesis drafts or final projects, email yourself copies as additional insurance.
Regular Review Habits
Annotation helps only if you review it. Schedule weekly sessions to revisit annotated lecture slides and readings. The spaced repetition strengthens memory better than cramming before exams.
FAQ
Can you annotate a PDF on an iPad?
Yes, every iPad with iPadOS 15 or later includes built-in PDF annotation tools through the Preview app, Files app, and Notes app. You can highlight text, draw, add text boxes, insert shapes, and create signatures without downloading any additional software.
How to annotate a PDF on iPad without Apple Pencil?
You can annotate using your finger by tapping and holding text to select it, then choosing highlight, underline, or strikethrough from the popup menu. For drawing, activate the pen tool and use your finger as a stylus. Third-party styluses like Logitech Crayon provide better precision at lower cost than Apple Pencil.
Can I draw on a PDF on my iPad?
Yes, all native iPad PDF tools include drawing capabilities. In Preview, tap the marker icon and select the pen tool. Choose from pen, marker, or pencil styles with adjustable thickness. Draw freehand to circle important sections, create arrows, or sketch diagrams directly on your PDF.
How to be able to write on a PDF on iPad?
Open the PDF in Preview, Files, or Notes app and tap the markup toolbar. Select the text tool from the plus menu to add typed text boxes anywhere on the document. For handwriting, use Apple Pencil or your finger with the pen tool. The Scribble feature converts handwriting to typed text in any text field.
How do I highlight on a PDF on my iPad?
Open your PDF in Preview or any annotation app. Drag to select text you want to highlight. A popup menu appears with options including Highlight, Underline, and Strikethrough. Tap Highlight to apply yellow background color to the selected text. Change highlight colors through the markup toolbar settings.
What is the best free PDF annotator for iPad?
Xodo PDF Reader and Adobe Acrobat Reader offer the best free annotation experiences. Xodo provides highlighting, drawing, text boxes, signatures, and cloud sync without ads. Adobe Acrobat Reader ensures accurate rendering of complex PDFs with solid basic annotation tools. Both support the essential features students need without subscription costs.
Can I convert handwritten notes to text on iPad?
Yes, using the Scribble feature built into iPadOS. Double-tap any text field in a PDF form or annotation app, then write with Apple Pencil. Your handwriting converts to typed text automatically. GoodNotes and Notability also offer lasso-select conversion of handwriting to typed text with formatting options.
How do I share annotated PDFs with classmates?
Tap the share button in any annotation app to send via Messages, Mail, or AirDrop. For collaboration, use Notes app to invite classmates to view or edit your annotated PDFs in real-time. Export annotated PDFs from any app to cloud storage like Google Drive or Dropbox, then share the link. Some apps like GoodNotes support shared notebooks for group projects.
Conclusion
Annotating PDFs on iPad for school opens possibilities that paper notebooks cannot match. Your iPad arrives ready with Preview, Files, and Notes apps that handle highlighting, drawing, and organization without additional cost. Students who need more power find excellent options in GoodNotes 6, Notability, PDF Expert, or capable free alternatives like Xodo.
Start with the built-in tools to understand your annotation style. Experiment with Apple Pencil if you have one, or master finger-based markup for quick edits. Once you hit limitations, invest in third-party apps that match your specific needs: handwriting search, audio recording, or professional PDF handling.
The students who benefit most from PDF annotation develop consistent systems early. Choose your color codes, folder structure, and backup habits in the first weeks of class. Maintain these habits throughout the semester, and you will build a searchable, shareable knowledge base that outlasts any single course.
How to annotate PDFs on iPad for school is not just about learning software features. It is about creating a personal system that helps you learn faster, remember longer, and collaborate better. Start with one PDF today, and discover how digital annotation transforms your academic workflow.