
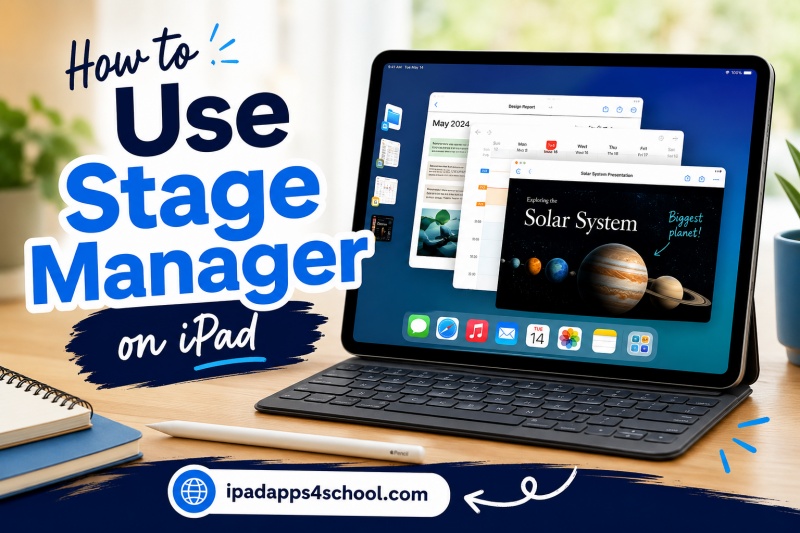
Stage Manager transforms how you multitask on iPad. This powerful feature turns your tablet into a productivity machine that rivals traditional computers. Our team has spent months testing Stage Manager across different iPad models and workflows.
Whether you are writing research papers, taking notes during lectures, or managing complex projects, Stage Manager lets you work with up to four apps simultaneously. You can resize windows, overlap them, and switch between tasks without losing your place. This guide shows you exactly how to use Stage Manager on iPad, from basic setup to advanced student workflows.
Table of Contents
What is Stage Manager on iPad
Stage Manager is an iPadOS feature that organizes your open apps into overlapping windows on the screen. It displays one app prominently in the center while showing thumbnails of other recently used apps on the left side. You can resize, move, and overlap windows just like on a desktop computer.
Unlike traditional iPad multitasking that locks you into Split View or Slide Over, Stage Manager gives you flexible window management. The feature automatically creates “stages” or workspaces where your apps live. Each stage remembers which apps you had open and how you arranged them.
Stage Manager matters because it finally delivers desktop-class multitasking to iPad. Students can have Safari open for research, Notes for jotting ideas, a PDF textbook on one side, and a calculator nearby. Everything stays visible and accessible without constant app switching.
Which iPads Support Stage Manager
Not every iPad can run Stage Manager. Apple requires specific processors to handle the windowing system smoothly. You need an iPad with an M-series chip or specific A-series processors to use this feature.
These iPad models support Stage Manager fully, including external monitor support:
- iPad Pro 12.9-inch (5th generation and later) with M1 or later
- iPad Pro 11-inch (3rd generation and later) with M1 or later
- iPad Air (M2 models released in 2026)
- iPad Air (M1, 5th generation)
These iPad models support Stage Manager on the built-in display only (no external monitor support):
- iPad Pro 12.9-inch (3rd and 4th generation) with A12X or A12Z
- iPad Pro 11-inch (1st and 2nd generation) with A12X or A12Z
- iPad Air (4th generation) with A14
The iPad 10th generation with A14 does not support Stage Manager. Apple limited this feature to specific chips that can handle the graphics demands of overlapping windows. If you have an older iPad or standard iPad model, you will need to use Split View and Slide Over for multitasking.
How to Enable Stage Manager on iPad
Turning on Stage Manager takes just a few taps. You can activate it from Control Center, which is the fastest method. You can also enable it through Settings if you prefer.
Here is how to turn on Stage Manager using Control Center:
- Swipe down from the top right corner of your screen to open Control Center.
- Look for the Stage Manager icon, which shows three dots to the left of a rectangle.
- Tap the Stage Manager icon once to enable the feature.
- Your current app will center on screen, and recent app thumbnails will appear on the left.
You can also enable Stage Manager through Settings if Control Center is not accessible. Open the Settings app, tap Multitasking and Gestures, then select Stage Manager under the Multitasking section. Toggle the switch to turn it on.
The first time you enable Stage Manager, a brief tutorial overlay appears. This shows you how the left-side thumbnails work and how to arrange windows. You can dismiss it by tapping the screen, or walk through the quick demonstration.
How to Turn Off Stage Manager
Sometimes you want to return to full-screen single app mode. Disabling Stage Manager is just as easy as enabling it. Your apps will return to their normal full-screen state when you turn it off.
- Swipe down from the top right corner to open Control Center.
- Tap the Stage Manager icon again to toggle it off.
- Your current app expands to fill the screen.
- The left-side thumbnails disappear.
You might want to disable Stage Manager when reading ebooks, watching videos, or using apps that benefit from the full display. Some users prefer to turn it off when they need maximum screen real estate for a single task.
How to Use Stage Manager – Complete Step-by-Step Guide
Once Stage Manager is active, you have powerful window controls at your fingertips. These techniques let you arrange your workspace exactly how you want it. Master these fundamentals to boost your productivity.
How to Resize App Windows
Resizing windows in Stage Manager is intuitive. Every app window has a dark curved handle at the bottom center. You can drag this handle to make the window larger or smaller.
Drag the handle downward to expand the window toward the edges of your screen. Drag it upward to shrink the window and create more space for other apps. The window snaps to preset sizes as you drag, giving you consistent dimensions that work well together.
Some apps support multiple size classes. You might see a small, medium, and large option depending on the app. Not every app resizes freely, but most popular productivity apps support at least two sizes.
How to Move App Windows
Moving windows lets you position apps exactly where you need them. This is one of Stage Manager’s most powerful features compared to Split View. You can place windows anywhere, not just side by side.
To move a window, touch and hold the top portion of any app window. The window lifts slightly to indicate it is ready to move. Drag it to your desired position and release. The window stays exactly where you place it.
You can overlap windows partially or keep them separated. Many users arrange a main app in the center with reference apps tucked to the sides. Experiment with different layouts to find what works for your tasks.
How to Add Multiple Apps (Up to 4)
Stage Manager supports up to four apps visible simultaneously on your iPad screen. Adding apps to your stage works several ways. Each method fits different workflow situations.
Method 1: Drag from the Dock
Swipe up slightly from the bottom to reveal the Dock. Touch and hold any app icon, then drag it toward the center of your screen. Release to add it as a new window. You can drag it onto an existing window to replace that app, or to an empty area to add it alongside.
Method 2: Use the App Library
Tap the App Library icon in the Dock to see all your installed apps. Find the app you want and drag it onto your stage. This method works great when the app is not in your Dock.
Method 3: Three-Dot Menu
Tap the three dots at the top of any window. Select Add Window to open the App Library and choose another app. This method is precise when you want a specific app relationship.
When you reach four apps, the system prevents adding more windows to the current stage. You can still switch apps by tapping thumbnails on the left, which replaces the least recently used window.
How to Switch Between Apps
The left sidebar in Stage Manager shows thumbnails of your recent apps. These thumbnails make switching fast and visual. You always see what is running without guessing.
Tap any thumbnail on the left to bring that app to the center stage. The previously active app moves to the thumbnails or stays visible if you have multiple apps open. Recent apps appear at the top of the thumbnail stack for quick access.
You can also use the App Switcher by swiping up and holding from the bottom. This shows all open apps in the traditional card view. Apps running in Stage Manager appear here alongside full-screen apps.
Understanding the Three-Dot Menu
Every app window in Stage Manager has a three-dot menu at the top. This menu provides essential window controls. Learning these options unlocks the full potential of Stage Manager.
Full Screen: Expands the current app to fill the entire display. This temporarily exits the Stage Manager view for that app while keeping Stage Manager active for others. Tap the three dots again and select Exit Full Screen to return to windowed mode.
Add Window: Opens the App Library to select another app. The new app appears alongside the current one. This is a fast way to build multi-app workspaces.
Minimize: Sends the current app to the left sidebar as a thumbnail. The app keeps running but clears space for other work. Tap the thumbnail to restore it.
Close: Quits the app entirely. The window disappears and the app stops running. This is different from minimizing, which keeps the app active.
Using Stage Manager with External Monitors
External monitor support takes Stage Manager to another level. You can extend your workspace across a large display while keeping your iPad screen active. This feature requires an M-series iPad Pro or iPad Air.
With an external monitor connected, you get two separate Stage Manager stages. Your iPad shows up to four apps, and your external display shows up to four different apps. That is eight apps visible simultaneously across both screens.
Here is how to set up Stage Manager with an external display:
- Connect your iPad to a monitor using a USB-C or Thunderbolt cable.
- Make sure Stage Manager is enabled on your iPad.
- Your external display automatically shows a Stage Manager stage.
- Drag apps between screens by moving them to the display edge.
- Arrange windows independently on each display.
External displays support up to 6K resolution. This means you can connect to high-end monitors and get crisp, clear text for reading and writing. The Thunderbolt ports on iPad Pro models handle this best, though USB-C works well for most displays.
Not all apps support external display mode equally. Some apps mirror the iPad screen rather than extending it. Check your specific apps to see how they handle dual-screen setups.
Stage Manager for Students: Study Workflow Examples
Students benefit enormously from Stage Manager’s flexible layouts. The ability to see reference material, notes, and writing tools together streamlines studying. Here are proven workflows our team tested in real academic scenarios.
Research Paper Workflow
Set up Safari with academic sources on the left third of your screen. Place Notes or your writing app in the center as your main workspace. Put a PDF of your assignment brief on the right. Add the Dictionary app minimized on the far left for quick word lookups. This layout keeps everything you need visible while writing.
Math and Science Homework
Open your calculator app (or Desmos for graphing) on the left. Keep your homework assignment PDF visible in the center. Have Notes open on the right for showing your work. Add a reference textbook PDF minimized for checking formulas. You solve problems faster when all tools are one tap away.
Language Learning Session
Run Duolingo or your language app in the center for active lessons. Keep a dictionary app on the left for unknown words. Have Safari open on the right for cultural context or grammar resources. Add Notes minimized for vocabulary you want to save.
Exam Review Setup
Create a focused review space with your notes app in the center. Place practice questions on the left. Keep a timer app visible on the right to simulate test conditions. Minimize your music app in the background if you study with background audio.
These are starting points. Experiment with different combinations based on your courses. The best Stage Manager layout depends on your specific tasks and how your brain processes information.
Stage Manager vs Split View: Which Should You Use
Stage Manager and Split View both enable multitasking, but they serve different purposes. Understanding when to use each makes you more efficient. Many users switch between both modes depending on the task.
Split View divides your screen evenly between two apps. It works on all iPad models and feels stable and predictable. You cannot resize windows freely or overlap them. Split View excels when you want two apps side by side with no distractions.
Stage Manager offers more flexibility with up to four apps and freeform window placement. It requires newer hardware and has a learning curve. Stage Manager excels when you need multiple reference materials or want to arrange windows creatively.
| Feature | Stage Manager | Split View |
|---|---|---|
| Number of apps | Up to 4 | 2 apps |
| Window placement | Freeform, overlapping | Fixed side by side |
| Compatible iPads | M-series, A12Z+ | All iPad models |
| External display | Yes (M-series only) | No |
| Learning curve | Moderate | Low |
| Screen space usage | Adjustable margins | Maximum efficiency |
Use Split View when you want simplicity and maximum screen efficiency. Use Stage Manager when your workflow demands more apps and flexible layouts. You can toggle Stage Manager on and off throughout your day as needs change.
Keyboard and Trackpad Shortcuts for Stage Manager
Adding a keyboard and trackpad transforms Stage Manager into a desktop-like experience. Keyboard shortcuts speed up window management significantly. These commands work with Apple’s Magic Keyboard or any Bluetooth keyboard.
App Switching Shortcuts:
- Command + Tab: Cycle through recent apps
- Command + Shift + Tab: Cycle backward through apps
- Three-finger swipe left/right on trackpad: Switch between recent apps
Window Management Shortcuts:
- Control + Up Arrow: Show all windows of current app (App Expose)
- Command + Mission Control key: View all open windows
- Escape key: Exit full-screen or close modal windows
Trackpad Gestures:
- Three-finger swipe up: Enter App Switcher
- Three-finger swipe down: Return to home screen
- Two-finger swipe from left edge: Switch to previous app
- Cursor hover over thumbnail: Preview window before clicking
These shortcuts become muscle memory with practice. Start with Command + Tab for app switching, then add others as you get comfortable. The time invested learning shortcuts pays off in faster workflows.
Troubleshooting Common Stage Manager Issues
Even experienced users encounter Stage Manager frustrations. These solutions address the most common problems reported in forums and community discussions. Most issues have simple fixes once you know where to look.
Stage Manager Is Not Showing or Available
First, verify your iPad model supports Stage Manager using the compatibility list earlier in this guide. Check that you are running iPadOS 16 or later by going to Settings > General > About. Update your software if needed. Restart your iPad if the option appears in Settings but does not work.
Screen Space Feels Wasted
This is the most common complaint about Stage Manager. The feature leaves margins around windows by design. You cannot eliminate these margins completely. Try resizing windows larger to reduce wasted space. Use full-screen mode for apps that need maximum space, then return to Stage Manager for multitasking phases.
Some users find Stage Manager works better on larger iPad screens. The 12.9-inch iPad Pro shows more content even with margins. Consider whether Split View might serve you better for space-constrained work.
Apps Will Not Resize or Group
Not all apps support Stage Manager fully. Some apps, particularly older ones or those with specific layouts, refuse to resize. Check if the app supports multitasking at all. Apps that only run full screen will not work in Stage Manager windows.
Update your apps to the latest versions. Developers continuously add Stage Manager support. Contact the app developer if a critical app lacks windowing support.
Performance Lag with Multiple Apps
Running four complex apps simultaneously demands significant processor power. Close unnecessary apps to free up memory. Disable background app refresh for apps you are not actively using. Restart your iPad if performance degrades over time.
Check your iPad storage. Nearly full storage slows down multitasking. Delete unused apps and files to maintain at least 10 percent free space.
External Display Not Working
External monitor support requires M-series iPads. A12X and A12Z iPad Pro models do not support external Stage Manager stages. Verify your cable supports video output. Some USB-C cables only charge or transfer data. Use a Thunderbolt 3 or 4 cable, or a high-quality USB-C video cable.
Frequently Asked Questions
Can I use Stage Manager on my iPad?
You can use Stage Manager if you have an iPad Pro (3rd generation or later), iPad Air (4th generation or later with M1/M2), or iPad Pro 11-inch (1st generation or later). The iPad, iPad Mini, and older iPad Pro models do not support this feature. Check your specific model in Settings > General > About.
How to use stage manager on iPad 10?
The iPad 10th generation does not support Stage Manager. Apple limited this feature to iPads with A12X, A12Z, or M-series processors. If you have an iPad 10, use Split View and Slide Over for multitasking instead.
Is stage manager useful on iPad?
Stage Manager is highly useful for productivity tasks requiring multiple apps. It excels for research, writing, coding, and creative work where you need references visible. It may not be worth using for single-app tasks like reading or watching videos where it wastes screen space.
How many apps can I use with Stage Manager?
You can have up to four apps visible simultaneously on your iPad screen. With an external monitor connected to an M-series iPad, you can have four apps on the iPad and four different apps on the external display, totaling eight apps visible at once.
Can I use Stage Manager with an external monitor?
Yes, but only on M-series iPad Pro and iPad Air models. External display support requires the M1 chip or later. You can connect up to a 6K resolution monitor. A12X and A12Z iPad Pro models support Stage Manager on the built-in display only.
How do I turn off Stage Manager?
Swipe down from the top right corner to open Control Center. Tap the Stage Manager icon (three dots next to a rectangle) to toggle it off. Alternatively, go to Settings > Multitasking and Gestures > Stage Manager and turn off the toggle.
Why is Stage Manager wasting screen space?
Stage Manager intentionally leaves margins around windows to show the desktop background and maintain visual organization. This is by design and cannot be fully disabled. You can minimize wasted space by resizing windows larger or using full-screen mode for single-app focus.
Does Stage Manager work on iPad Mini?
No, Stage Manager is not available on any iPad Mini model. The feature requires processors found only in recent iPad Pro and iPad Air models. iPad Mini users should rely on Split View and Slide Over for multitasking.
Conclusion
Stage Manager transforms how you use your iPad for serious work. Once you learn how to use Stage Manager on iPad, you unlock desktop-class multitasking that rivals traditional computers. The ability to resize, move, and overlap windows gives you control over your workspace that Split View cannot match.
Start with the basics: enable Stage Manager from Control Center, practice resizing windows, and learn the three-dot menu options. Build up to advanced workflows like external monitor setups and keyboard shortcuts. Remember that Stage Manager shines for complex tasks but can be disabled when you want simple full-screen focus.
Students especially benefit from the flexible layouts Stage Manager enables. Whether you are researching papers, solving math problems, or studying for exams, having multiple apps visible keeps you in the flow. Take time to experiment with different window arrangements to find what works for your specific courses and study habits.
The future of iPad multitasking is here in 2026. Stage Manager continues improving with each iPadOS release, adding better gesture support and refinement. Master it now and stay ahead of the curve as Apple pushes the iPad further into productivity territory.
2 thoughts on “How to Use Stage Manager on iPad (October 2026) Guide for Students”