
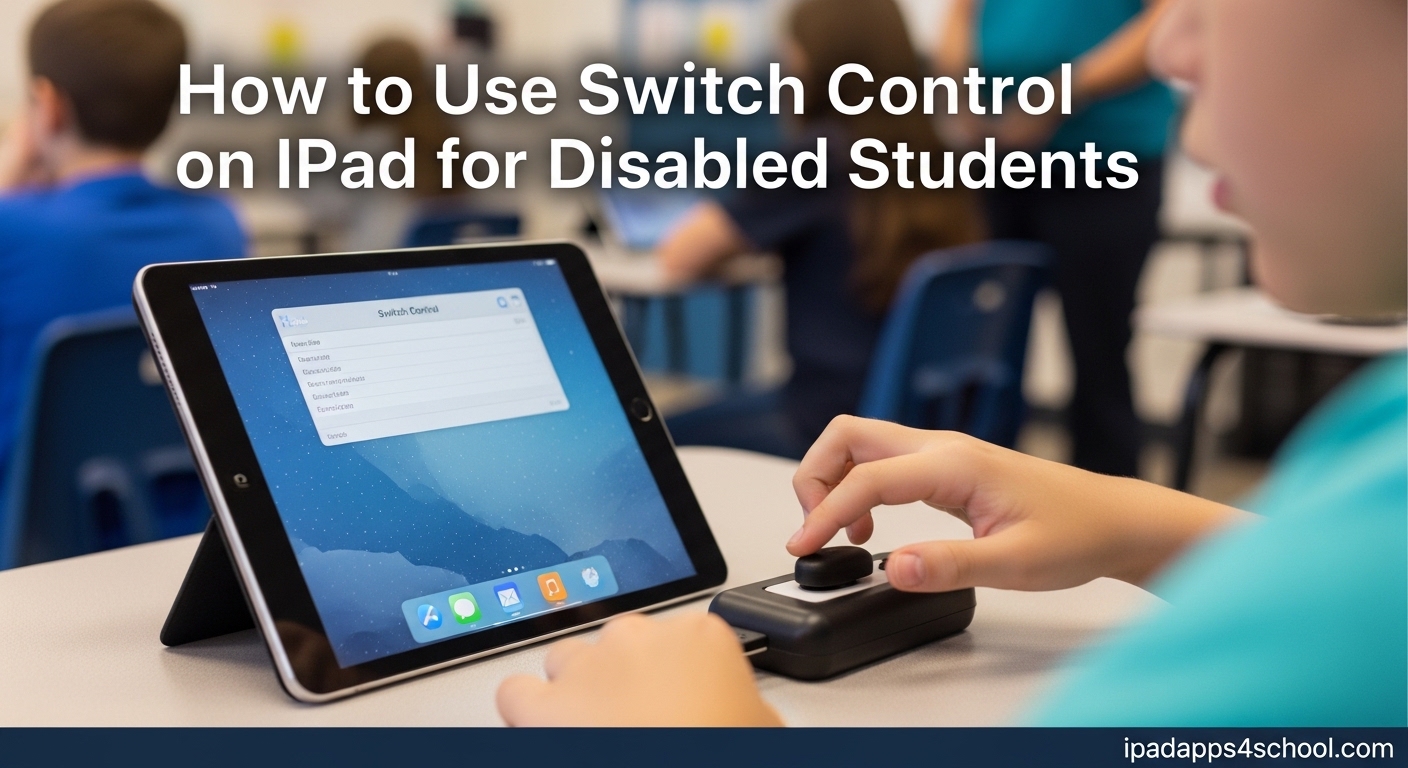
Last month, I watched a 12-year-old student with cerebral palsy independently complete a science quiz on his iPad for the first time. His teacher had spent three weeks setting up Switch Control, and that moment changed everything for him. Switch Control on iPad gives disabled students the power to navigate, communicate, and learn independently, even when they cannot use their hands to touch the screen.
In this guide, I will walk you through exactly how to use Switch Control on iPad for disabled students. I have tested these setups with occupational therapists and special education teachers over the past few months. You will learn how to configure switches, set up scanning methods, create recipes for complex tasks, and troubleshoot the common issues that frustrate educators and parents.
Whether you are a teacher with one student who needs alternative access or a parent helping your child gain independence, this guide covers everything you need to know. Switch Control is already built into every iPad at no extra cost. You just need to know how to turn it on and make it work for your specific situation.
Table of Contents
What Is Switch Control on iPad
Switch Control is an assistive technology built into iOS and iPadOS that lets users control their entire device without touching the screen. It works by scanning through on-screen items and waiting for the user to activate a switch when the desired item is highlighted. This iPad accessibility feature turns a simple button press, head movement, or even a sound into full control over the device.
Think of it like a spotlight moving across the screen, landing on each button, icon, or menu option for a few seconds. When the spotlight hits what the student wants, they press their switch. The iPad registers that activation and performs the action, whether it is opening an app, typing a letter, or scrolling a page.
Switch Control supports multiple input methods. Students can use external Bluetooth switches, the iPad’s own screen as a switch, the camera to detect head movements, or even sound-based activation. This flexibility makes it work for students with a wide range of physical abilities and disabilities.
Who Benefits from Switch Control
Switch Control was designed specifically for people with limited mobility who cannot use traditional touch gestures. In educational settings, I have seen it transform learning for students with cerebral palsy, spinal cord injuries, muscular dystrophy, and traumatic brain injuries. It also helps students with repetitive strain injuries or temporary conditions that make touch screens difficult to use.
The students who benefit most are those who have reliable control over at least one body part, even if that movement is minimal. A slight head nod, a thumb twitch, or a gentle foot press can become their gateway to digital learning. Occupational therapists often work with students to find the most reliable and comfortable switch activation method.
Switch Control also supports students with autism and other cognitive disabilities who may understand touch screens but struggle with the fine motor control required for precise tapping and swiping. By simplifying interactions to a single press, these students can focus on learning content rather than fighting with interface mechanics.
Types of Switches Compatible with iPad
Before setting up Switch Control, you need to understand what types of switches work with iPad. I have organized the options from simplest to most complex, so you can choose what matches your student’s abilities and your classroom budget.
External Bluetooth Switches
Bluetooth adaptive switches are the most reliable option for classroom use. These physical buttons connect wirelessly to the iPad and provide consistent, predictable activation. Popular options include the AbleNet Blue2, SwitchBot, and various Jelly Bean switches with Bluetooth interfaces.
These switches typically have large activation surfaces that require minimal pressure. Some students use them with their hands, while others activate them with their head, knee, elbow, or foot. The Bluetooth connection keeps the setup clean without wires that could tangle or get pulled out accidentally.
Using the iPad Screen as a Switch
You can turn the entire iPad screen into one giant switch. This works well for students who can tap anywhere on the screen but struggle with targeting specific small buttons. When screen-as-switch is enabled, any tap anywhere performs the selected action.
This mode is perfect for students who have consistent movement but lack precision. It is also the fastest way to test whether Switch Control will work for a student before investing in external hardware. I often recommend teachers start here to prove the concept before buying equipment.
Camera-Based Head Tracking
The iPad’s front camera can track head movements and use them as switch activations. Students can move their head left, right, up, or down to trigger different actions. This requires no additional hardware beyond the iPad itself.
Head tracking works best for students with good head control but limited limb movement. The camera detects facial position and registers a switch activation when the student moves their head past a configurable threshold. You can adjust the sensitivity to match the student’s range of motion.
Sound-Based Switching
Some students can make consistent sounds but cannot perform reliable physical movements. Switch Control can listen for specific sounds and use them as activation triggers. A click, hum, or specific word can become the switch signal.
This method requires careful calibration to avoid false activations from classroom noise. I recommend it for quiet home environments or one-on-one therapy sessions rather than busy classrooms. When it works, it gives voice to students who have no other reliable motor control.
How to Set Up Switch Control on iPad
Setting up Switch Control takes about fifteen minutes the first time you do it. Follow these steps carefully, and test each component before moving to the next. I recommend having your switch hardware ready before you start.
Step 1: Open Settings on the iPad. Tap Accessibility, then scroll down to Physical and Motor Skills. Tap Switch Control.
Step 2: Toggle Switch Control to the ON position. The system will briefly explain what is about to happen. Tap Continue to proceed.
Step 3: If you are using a Bluetooth switch, put it in pairing mode now. Return to Settings, tap Bluetooth, and wait for your switch to appear in the Other Devices list. Tap it to pair.
Step 4: Go back to Settings > Accessibility > Switch Control > Switches. Tap Add New Switch. Choose External if using a Bluetooth device, Screen for full-screen touch, Camera for head tracking, or Microphone for sound activation.
Step 5: Follow the on-screen prompts to configure your switch. You will test the activation and assign an action like Select Item or Stop Scanning. If you are using multiple switches, repeat this process for each one.
Step 6: Return to the main Switch Control settings and tap Scanning Style. Choose Auto Scanning for beginners. The system will highlight items automatically and wait for your switch press.
Test your setup by returning to the home screen. You should see a highlight moving between apps. When it lands on the app you want, press your switch. If everything works, you are ready to start teaching the student how to use the system. If you need additional guidance on iPad configuration, check out our guide on Stage Manager accessibility features for related settings.
How to Add and Configure Switches
Most students benefit from having more than one switch. Multiple switches allow different actions without navigating through menus each time. Here is how to build a multi-switch setup.
Adding Additional Switches
Open Settings > Accessibility > Switch Control > Switches. Tap Add New Switch again. Select your input source, whether that is another Bluetooth button, a different screen area, or an alternative camera gesture.
Each switch needs a unique assignment. Common setups include one switch for Select Item, another for Move to Next Item, and a third for tapping the Home button. This gives students direct access to the three most common actions.
Configuring Switch Actions
When you add a switch, you assign it an action from a long list of possibilities. The most important actions for students are:
- Select Item: Taps the currently highlighted item. This is the primary action every student needs.
- Move to Next Item: Moves the highlight to the next interface element without waiting for auto-scanning.
- Move to Previous Item: Goes backward through the interface elements.
- Tap: Performs a tap action at the current location.
- Home: Returns to the home screen immediately.
- Recipes: Triggers a custom sequence of actions you define.
I recommend starting with just Select Item and adding more switches only after the student masters the basics. Too many options too quickly overwhelms most learners.
Testing Your Configuration
After adding each switch, test it immediately. The setup screen shows a Test button that lets you verify the switch registers correctly. Watch for false activations caused by accidental bumps or environmental noise.
Have the student practice the activation motion several times while you watch the test indicator. If the switch triggers inconsistently, adjust the physical position or change the activation method. A switch that works 80% of the time creates more frustration than one that works 100% with a different body part.
Switch Control Scanning Methods Explained
Scanning is how Switch Control moves the selection highlight across the screen. Understanding the different scanning methods helps you match the system to each student’s cognitive and physical abilities.
Item Mode Scanning
Item Mode is the default and most common scanning method. The highlight moves from one interactive element to the next, touching each button, text field, and control in sequence. When the highlight reaches the target item, the student activates their switch.
This mode works best when the student understands the layout of the screen and can predict where the highlight will go next. It is efficient for structured apps with clear button layouts. I recommend Item Mode for most students who are beginning with Switch Control.
Auto Scanning
Auto Scanning moves the highlight automatically on a timer. You set the scanning speed in milliseconds. Common starting points are 1.5 to 2 seconds per item, giving the student time to recognize the highlight and prepare to press.
Adjust the speed based on the student’s reaction time. Too fast causes missed selections and frustration. Too slow makes simple tasks take forever. Start slow and gradually increase speed as the student improves.
Manual Scanning
Manual Scanning requires the student to activate one switch to move the highlight and another switch to select. This gives the user complete control over timing. The highlight stays put until the student says to move.
This method requires two reliable switches and more cognitive load, but it removes the pressure of timing. Students who get anxious about auto-scanning often succeed with manual control. You need at least one switch assigned to Move to Next Item and another to Select Item.
Point Scanning
Point Scanning uses crosshairs that scan horizontally and vertically across the entire screen. The student stops the horizontal scan, then stops the vertical scan, creating an X-Y coordinate for tapping.
This method can reach any point on the screen, not just predefined buttons. It is essential for apps with small targets or free-form drawing. However, it requires more practice and is harder for students with cognitive impairments to master.
Choosing the Right Method
For most disabled students in educational settings, I recommend starting with Item Mode using Auto Scanning. It is the easiest to understand and requires only one switch. Once the student masters single-switch Item Mode, consider adding a second switch for Manual Scanning to increase speed and control.
Point Scanning should be reserved for specific tasks that require tapping arbitrary screen locations. Introduce it only after the student shows proficiency with Item Mode and expresses a need to access areas that Item Mode cannot reach.
How to Create and Use Switch Control Recipes
Recipes are pre-recorded sequences of gestures that execute with a single switch activation. They are powerful tools for students who need to perform complex actions repeatedly. Think of a recipe as a macro that automates multi-step tasks.
What Are Switch Control Recipes
A recipe might include swiping left three times, tapping a specific button, and then typing a phrase. Instead of performing each step individually with Switch Control, the student activates one switch and the entire sequence plays automatically.
Recipes shine for repetitive educational tasks. A student might have a recipe to open their communication app and navigate to the food category, or a recipe to launch their reading app and load the current assignment. These shortcuts save minutes on every task.
Creating a New Recipe
Open Settings > Accessibility > Switch Control > Recipes. Tap Create New Recipe. Give it a descriptive name like “Open Proloquo and Select Food Category” so you can identify it later.
Tap Assign a Switch and choose which switch will trigger this recipe. Then tap Record Gesture and perform the exact sequence of actions you want to automate. The iPad records every tap, swipe, and pause.
After recording, you can adjust the timing between actions. Some students need longer pauses between gestures for the app to respond. Test the recipe several times and watch for timing issues.
Switch Sets for Context Control
Switch Sets allow different switch assignments for different situations. You might have one set for browsing the web, another for using a communication app, and a third for playing games. The student or teacher can switch between sets without reconfiguring individual switches.
To create a Switch Set, go to Settings > Accessibility > Switch Control > Switch Sets. Tap Create New Switch Set, name it, then add switches with actions specific to that context. You can assign a switch to activate a different Switch Set, letting the student move between contexts independently.
I recommend creating a School Set with actions for common educational apps and a Home Set for entertainment and communication. This keeps the interface clean and relevant to what the student is doing.
Using Head Tracking as a Switch Alternative
Head Tracking turns the iPad’s front camera into a switch that responds to head movements. For students who cannot reliably press physical buttons but have good head control, this can be a game-changer.
Setting Up Head Tracking
Go to Settings > Accessibility > Switch Control > Switches. Tap Add New Switch, then select Camera as the source. Choose Left Head Movement, Right Head Movement, Up Head Movement, or Down Head Movement.
Follow the calibration instructions to set the movement threshold. The iPad shows a visual indicator of how far the student needs to move their head. Set the threshold large enough to avoid false activations from normal head movement, but small enough that the student can reliably trigger it.
Assign an action to each head movement direction. Most setups use left and right movements for Next and Previous Item, with a separate switch for Select Item. Some students use all four directions for different actions.
Benefits of Head Tracking
Head Tracking requires no additional hardware, making it free to try and portable between devices. It works in any lighting condition that the front camera can handle. Students who use wheelchairs with headrests can often activate the system with minimal movement.
The learning curve is gentle because head movement is intuitive. Students naturally look at what they want to select. With Head Tracking, that look becomes the selection trigger.
Limitations and Considerations
Head Tracking requires the student to stay within the camera’s view. Sudden movements, other people passing by, or changes in lighting can interfere. The system also draws more battery power than physical switches because the camera stays active.
I recommend Head Tracking for students with consistent head control in stable environments. For active students or outdoor use, physical switches are more reliable. Some teachers use both, switching to physical switches for recess or field trips while using Head Tracking in the classroom.
Accessibility Shortcuts and Quick Access
Once you have Switch Control configured, you need a fast way to turn it on and off. The Accessibility Shortcut lets you toggle Switch Control with three quick button presses.
Setting Up the Triple-Click Shortcut
Go to Settings > Accessibility, then scroll to the bottom and tap Accessibility Shortcut. Select Switch Control from the list. Now you can enable or disable Switch Control by triple-clicking the Home button or the Side button, depending on your iPad model.
This shortcut is essential for shared iPads or situations where multiple students use the same device. Teachers can quickly enable Switch Control for the student who needs it, then turn it off for other users.
What Happens When You Triple-Click
When you press the Home button three times quickly, the iPad checks if Switch Control is currently running. If it is off, the system enables it and begins scanning. If it is on, the system disables it and returns to normal touch control.
The triple-click must be fast. If you press too slowly, the iPad registers three separate Home button presses instead of a shortcut. Practice the timing until it becomes automatic.
Accessibility Shortcut Menu
If you enable multiple accessibility features in the shortcut menu, triple-clicking brings up a menu instead of immediately toggling Switch Control. You then tap Switch Control to enable it. This adds one step but lets you access VoiceOver, AssistiveTouch, or other features from the same shortcut.
I recommend keeping only Switch Control in the Accessibility Shortcut for students who exclusively use that feature. The direct toggle is faster and less confusing than navigating a menu.
Tips for Educators Working with Disabled Students
After setting up the technology, the real work begins: teaching students to use Switch Control effectively. These tips come from my conversations with special education teachers and occupational therapists who use Switch Control daily.
Start with High-Motivation Activities
Begin Switch Control training with something the student loves, not homework. Music apps, games, or video players make excellent starting points. The student needs to care about the outcome to persist through the initial learning curve.
I have seen teachers start with a simple cause-and-effect app where pressing the switch plays a song or shows an animation. Once the student understands that their action causes a result, they are ready for more complex tasks.
Progress Gradually
Do not introduce multiple new concepts at once. Start with one switch and auto-scanning. Only add a second switch after the first one feels automatic. Only introduce Manual Scanning after Auto Scanning is mastered.
Each new element adds cognitive load. Students with physical disabilities often have fatigue issues as well. Short, frequent practice sessions work better than long, infrequent ones.
Integrate with Curriculum
Work with the student’s teachers to identify specific apps and tasks they need for class. Configure Switch Control specifically for those tools rather than trying to make one setup work for everything.
Recipes are especially powerful here. Create recipes for opening the reading app and loading the current assignment, or for navigating to the math app and starting the daily quiz. These shortcuts keep the student on pace with classmates. For more ideas on integrating technology into student workflows, explore our iPad tips for students.
Document the Setup
Write down the exact configuration for each student. Include which switches are assigned to which actions, the scanning speed, and any custom recipes. If the iPad gets updated or replaced, you can recreate the setup quickly.
Share this documentation with parents, therapists, and substitute teachers. Consistency across environments helps the student transfer skills from school to home.
Troubleshooting Common Switch Control Issues
Even with careful setup, you will encounter problems. Here are the most common issues educators report and how to fix them.
Invalid Configuration Error
The dreaded “Invalid Configuration” message usually means Switch Control is turned on but no switches are assigned, or all assigned switches are disconnected. The iPad cannot scan without at least one working switch.
To fix this, disable Switch Control using the triple-click shortcut or by asking Siri to “turn off Switch Control.” Then go to Settings > Accessibility > Switch Control > Switches and verify you have at least one switch configured and connected.
Bluetooth Connection Problems
Bluetooth switches sometimes disconnect randomly or fail to pair. First, check that the switch is charged or has fresh batteries. Then forget the device in Settings > Bluetooth and re-pair it.
Interference from other Bluetooth devices can cause issues. If the classroom has many iPads and switches, some may experience lag. Try moving the switch closer to the iPad or reducing the number of active Bluetooth connections.
Scanning Too Fast or Too Slow
If the student misses selections because the highlight moves too quickly, slow down the scanning speed. Go to Settings > Accessibility > Switch Control > Timing and increase the Auto Scanning Time. Start with 2 seconds and adjust based on the student’s performance.
If scanning feels painfully slow and the student is waiting unnecessarily, gradually decrease the time. Watch for signs of frustration or boredom as indicators that you can speed up.
How to Get Out of Switch Control
If Switch Control is active and you need to disable it quickly, triple-click the Home button or Side button. If that does not work because the shortcut is not configured, ask Siri to “turn off Switch Control” by holding the Home button or saying “Hey Siri.”
As a last resort, restart the iPad. Switch Control will still be enabled after reboot, but you may be able to navigate to Settings to turn it off before scanning begins if you are fast.
To prevent getting stuck, always configure the Accessibility Shortcut before enabling Switch Control for the first time. Triple-click is your emergency exit.
FAQ
How do you use switch control on iPad?
To use Switch Control on iPad, first enable it in Settings > Accessibility > Switch Control. Add at least one switch by going to Switches > Add New Switch. Choose your input source: external Bluetooth switch, screen touch, camera for head tracking, or microphone for sound. Configure scanning options in the main Switch Control settings. Once enabled, the iPad will highlight items on screen, and you activate your switch to select the highlighted item.
What does switch control do on an iPad?
Switch Control is an assistive technology that allows users with limited mobility to control their entire iPad without touching the screen. It scans through on-screen items and waits for the user to activate a switch when the desired item is highlighted. This enables students with physical disabilities to navigate apps, type, browse the web, and communicate independently using external switches, head movements, or other alternative input methods.
What happens when you press the home button three times on an iPad?
Triple-clicking the Home button activates the Accessibility Shortcut, which toggles Switch Control on or off. If Switch Control is disabled, triple-clicking enables it and scanning begins immediately. If Switch Control is running, triple-clicking turns it off and returns the iPad to normal touch control. You can configure which accessibility features respond to triple-click in Settings > Accessibility > Accessibility Shortcut.
Can I use switch control with a head tracking device?
Yes, iPad supports head tracking through the front camera as a switch input. Go to Settings > Accessibility > Switch Control > Switches, tap Add New Switch, and select Camera. Choose a head movement direction: left, right, up, or down. Follow the calibration instructions to set the movement threshold. Head tracking works best for students with good head control but limited limb movement, requiring no additional hardware beyond the iPad itself.
How to get out of switch control on iPad?
To exit Switch Control, triple-click the Home button or Side button quickly. If the Accessibility Shortcut is not configured, ask Siri to turn off Switch Control by holding the Home button and saying turn off Switch Control. As a last resort, restart the iPad. To prevent getting stuck, always set up the triple-click shortcut before enabling Switch Control for the first time.
What switches work with iPad for disabled students?
iPad works with Bluetooth adaptive switches like AbleNet Blue2 and SwitchBot, screen-as-switch mode where the entire display becomes a button, camera-based head tracking using the front camera, and sound-activated switching through the microphone. The best choice depends on the student’s physical abilities. Bluetooth switches provide the most reliable classroom performance, while head tracking requires no additional purchase.
How do I create switch control recipes for students?
To create a recipe, go to Settings > Accessibility > Switch Control > Recipes and tap Create New Recipe. Name it descriptively, assign a triggering switch, then tap Record Gesture. Perform the exact sequence of taps and swipes you want to automate. Adjust timing between actions if needed. Recipes are perfect for repetitive school tasks like opening a communication app and navigating to a specific category with one switch press.
Why does switch control show invalid configuration?
The Invalid Configuration error appears when Switch Control is enabled but no switches are assigned or all assigned switches are disconnected. Fix this by asking Siri to turn off Switch Control, then go to Settings > Accessibility > Switch Control > Switches to verify at least one switch is properly configured. Always configure switches before enabling Switch Control to avoid this error.
Empowering Students Through Switch Control
Switch Control transforms iPad from a touch-only device into an accessible gateway for students with physical disabilities. By understanding how to set up and configure this powerful tool, you give disabled students the independence to learn, communicate, and participate alongside their peers.
The technology is already in your iPad. The switches are available from numerous vendors or can be as simple as the screen itself or a head movement. What makes the difference is the educator or parent who takes the time to configure everything correctly and patiently teaches the student how to use it.
Start with one switch and auto-scanning. Celebrate every small success. Gradually add complexity as the student grows more confident. Document your setup and share knowledge with others who work with the student.
Switch Control on iPad for disabled students is not just about accessing technology. It is about accessing education, communication, and independence. That 12-year-old student I mentioned at the beginning now completes all his assignments independently. His teacher told me he smiled for an hour after finishing that first quiz. That is the power of giving students control over their own learning.
Take what you have learned in this guide and start small. Configure one switch. Test one app. Watch one student discover they can do it themselves. That moment makes every minute of setup worthwhile.